教学里面 , 有很多都需要到Photobucket 所以给一些初学者知道一下。
先去Photobucket注册
*照片点击放大*
看到红色框框了么 ? 按了他。
然后你会看到注册的东西。照片上有解释了 被红色线条割的就代表不用理他。
箭头的意思就是把蓝色背景箭头拉去右边。然后按Sign up
注册好后 到上顶 你会看到upload按他就会出现一下的图。
按BrowseFiles 然后选你要的图片。
上传好后 按 红色框框的 , 如果你还要在上传照片就按 Upload More
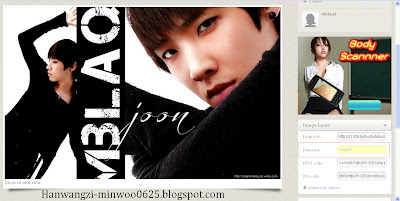
最后你会看到你图旁边会有4个格 , 按第二个格子Direct link 把滑鼠指向它 , 然后按一次 再按你keyboard的Ctrl+C按快快的。要确认你真的有按到 , 过后放在你教程的code就好了 :D
明白了不 ? xD


ENG
Tutorial inside, many of them need toPhotobucketso know to some beginners.
*Click to enlarge photo*
Saw the red frame ? accrding to him.
Then you will see something registered. Photos have explanation the cut red line represents don care for that.
The meaning of the arrow is the blue background arrows pull past to the right. then press Sign up.
then to the top, you will see upload as he appears Figure.
press the BrowseFiles then select the picture you want.
Upload after press the red frame, if you want uploading the photos press Upload More
Finally, you will see that you figure the next four grid, the second lattice Direct link use the mouse point to it, then you Ctrl + C keyboard quickly. To confirm that you really have to press on your tutorial after put the code in your tutorial :D
What problem leave a message ;)


.jpg)
.jpg)
没有评论:
发表评论
- 拿了素材 或 转了素材请奉上汗王子的连接 ! 谢谢。
- 转了素材也一样奉上汗王子的连接 谢谢。
- 评论不能一一回复 有问题就到CBOX问吧。
- 请尊重博主 要捣乱请不要在这里。
谢谢合作 :)